Sunday, September 20, 2015

School Starts...

This year, we started even later than last getting all our school supplies!  Tom just started a new job and that made somethings delayed.

Evelyn starts her second year of school; Kindergarten!
She is excited and a little worried as she always does, but we got the teacher we requested and she will also have two friends that she was close with in this class again.  There are several of the same kids in her Kinder class.  Same uniform and even more supplies to buy this year.  We have all her shirts and just one bottom so far.  My mom works at the same school so she was very excited (again) and bought all her shirts very quickly.

Tom is started his second year of premed and he, of course, is stressed.  New job and a new year of school is a lot to take on.  Plus having a wife and two kids five and under.

It's going to be another year full of adventures!

Day 30

Friday, September 18th, was day 30 with my Life Planner.
Updates of how I am using it, what I've changed since last time, and how well the unofficial covers are working.
During the first month, I kept my planner on a table and used it through out the day.  Keep that in mind when you look at the condition of the pages and such.

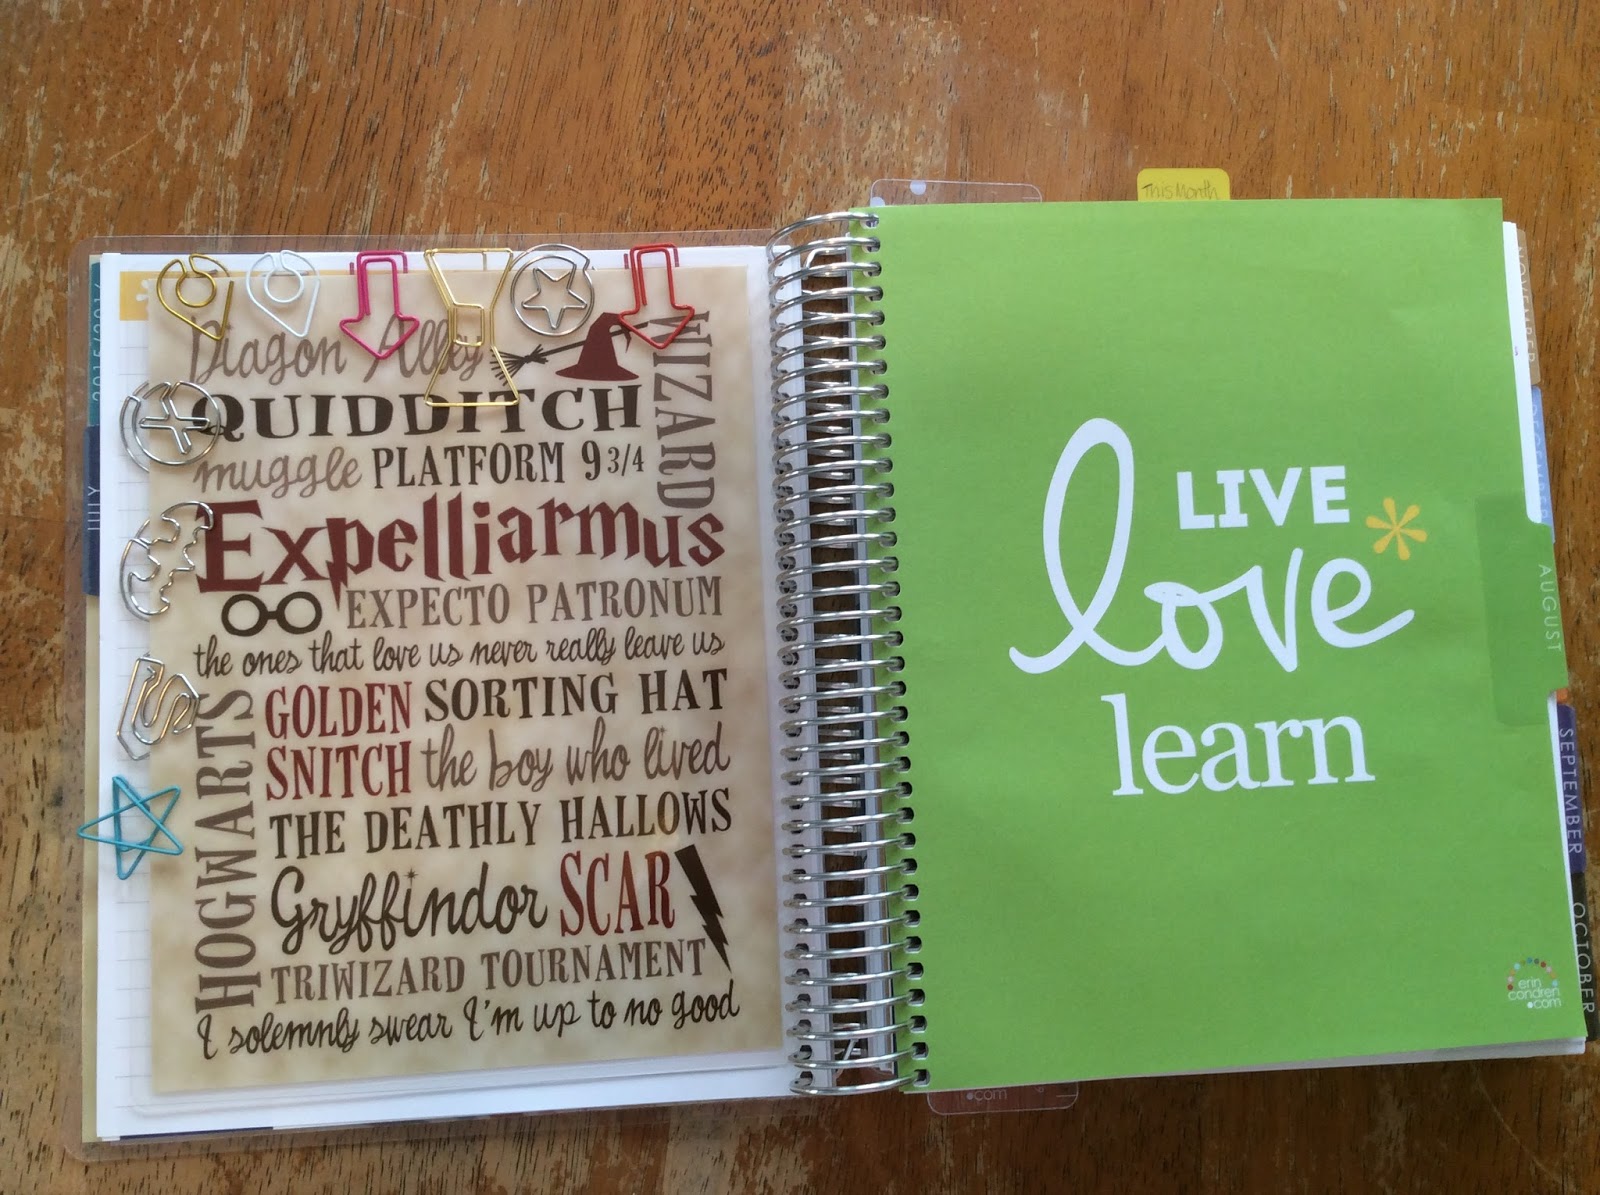
To start, the Harry Potter Subway Art covers are working just as good as they did on day one--which it great!  I moved my fun paper clips to a new large pencil bag and pulled out the HP Subway Art dashboard and set it aside for now.  I might find a use for it later, I moved it around a lot before I took it out, but for now, it sits with my HP books on a shelf.
Remember, you can buy these covers at Small Box of Treasures on Etsy, $20 for the three piece set and $15 for just the covers.  Check out everything else in the shop because they are so stinkin' cute!


So, one of the first things I did was write down Tom's schedule for school and work on card stock and put it in my planner.  I used washi tape to decorate it (Blue and Yellow, school colors!) and used two Clips to attach it to my planner.  Tip: when applying two Clips to one card, stick the first Clip to the card, put it in, put in the second where you want it, then take off the sticky and apply it.  I didn't measure it out that way so now that card is slightly lumpy.

I know my color coding, I've been using it for more than a year, so I put it to the front of my planner.  It is now out of the way and will be easy to use again later.


September month, showing that Day 30 is finished.  I always just X out days past, I found one line wasn't enough for me.


Recently we were shopping for a new vehicle; I started to use the Clips for business cards and would put them were I had notes for when I needed to make calls.  This made things so much easier.


Another auto salesman's card.  You can also see the cute little card that says "Our 6th Anniversary Plans."  I bought journaling cards from Walmart,
similar to these, and I have started to use them in my planner.  Five bucks for a big stack of fun card to use, YES PLEASE!


I moved the bookmark to mark the month I am on and you can see another card that I now use as my "This Week" marker.  It says, "Hello Life" and has lines to write a cute note to yourself.  You may notice that "focus" is misspelled.  That is on purpose.  It's to remind myself that even though I am striving to have patience and be focused, I will mess up and that's okay, as long as I work to be better continually.


This was the first full week of use.  You can see that I use flag stickers to point out fun things.  I also used check off flags to point out important things.  I don't like to use things like this for fun but to point out important things.  This helps me to remember what needs to be done.  My planner is for keeping mine and my family's lives organized, not for me to uselessly use up stickers and washi tape.


 PS-
One day, I was moving around my bookmark and then it started to feel lumpy at the bottom, as if it had melted.  I got a little panicked ("How did I melt it?!") but then I realized that there is a protective film on it.  Just FYI to those that buy one.  Just so you won't think that your bookmark is melting like I did.  
(It does get hot in South Texas, it wasn't as far fetched an idea as you might think.)

PPS-I have a larger bag now so I will be carrying my planner with me.  Stay tuned to see the difference from Month One of Use on a Desk--compared to--Month Two of Use in a Diaper Bag, Desk, Lap, and Everywhere Else.  Excited to see it!

Thursday, August 20, 2015

Day 1 With My Erin Condren Life Planner

I received many things for my planner from my family for my birthday.

My New Planning Supplies
You can see in this picture, that there are a lot of planning supplies that I was given.  There are two "Crown" pens, one is holding the washi tapes.  I don't know where most of this stuff came from but I love it all!

The coil clips from Erin Condren were also knew to my planning supplies.
I plan to also make DIY ones later but I wanted the official ones first.


These Are the Planning Supplies I Already Had

Smash Book scissors.  I've had these for a few years and I love them so much!  I have been carrying them in the diaper bag to have something safer than a pocket knife to cut things.  I might have to get another pair so I can keep one in the diaper bag and one with all my planner things.

Yoobi 8 Color Pen from Target.  I discovered this by accident.  I was just looking around the office supplies in Target, like I always do (huh, maybe not so accident), and I saw this pen.  Usually pens that have this many colors are a little pricy but this one wasn't!  

I already have some washi tape but it is all in storage so I am not able show it let alone use it.  :(

After putting on the new cover to my planner, 

I went to work!  Since it's only been one day, not much had really been done.
I moved my fancy  paper clips to my dashboard...

and made the legend for my color coding.

I use the, aforementioned, Yoobi multi colored pen in my planner to easily find who's doing what.
Black-everyday and me
Blue-birthday parties and anniversaries
Red-birthdays and marking my period days
Orange-church related actives
Green-Tom's stuff (green is his favorite color)
Purple-Evelyn's stuff
Pink-Raven's stuff

I used one of the three sample comment cards and the sample coil clip to make it.  That way I can move it from one month to the next.  This will be the second year I use this system and it's worked out nicely.

You see that little tab at the top of the page?

It says "This Month."  I use it to quickly go to the current month.

I put short versions of our plans on the month at a glance pages.

I usually use another tab for "This Week" but this planner comes with a clear book marker that can be changed around.  That is what I will use as my "This Week" marker.

I also used my little dot stickers to mark pay days.  You can also see here that I marked my 6th marriage anniversary!


I filled out my first Goal at the beginning of the planner.

This is the back cover.  I didn't get a close up before.

I marked out all the days that have past...
in the month...
and the weeks.

I did this weeks planning and once we get Evelyn's school schedule (holidays and special school days) I'll be able to fill out more planned days.

This is day one with my Life Planner!
Stay tuned for my post on 90 days of using my Life Planner!
(That should be on November 18, 2015, near a week before Thanksgiving!)
Don't worry, I'll have more between now and then.

Wednesday, August 19, 2015

Harry Potter Subway Art Erin Condren Life Planner Cover

So, I just got my Erin Condren Life Planner and the first thing I did to it, after documenting its arrival, was put on its new cover!


In my post about why I chose an Erin Condren Life Planner, I forgot to mention the name of the Etsy shop I got my covers and dashboard from; Small Box of Treasures.  She has such cute and awesome looking covers for your Erin Condren Life Planner.  You need to check them out!

I have been worried that this cover wouldn't match up to the official Erin Condren covers.  I am happy to say that it turned out perfectly at first use!

This is what it arrived in.  Two folders protecting it.

First look.

I love getting little cards like these in packages.  A little extra love sent!

Before I put on the new cover, I compared the cover the planner came with with the Small Box of Treasures cover.  The original cover's holes are slightly bigger and more boxy.  There wasn't enough difference to even have me worried that it wouldn't work well. 

When I started putting on the cover, my fingers started to get "snagged."  That's the best way I can describe it.  In the picture above you can see that I got myself a little tool to help me.  I looked around me for a pen and didn't see one, so I grabbed this toy spear off a McDonald's toy.  It did the job just fine!

The ultimate test!  I jiggled and shook it and this is the result.
Perfectly intact and still looking spiffy!


The covers, both on, with the planner on its "belly."

The new look of the inside.


I received the cover and dashboard set, from my mother in law, so I had more to attach.  I didn't know where to put it at first.  Did I want it to stay in one place or was I going to move it around?  I decided that I would move it from month to month.  Now, I thought the best place was at the front of each month to not cover so much of the planning.


I did The Ultimate Test again, and the results were also satisfying.


I am very pleased with this cover!  Just the right amount of Potter fandom and so well made!  Time will tell just how well made though.  Watch for future posts!


To take a look inside the Erin Condren Life Planner, check out this post.